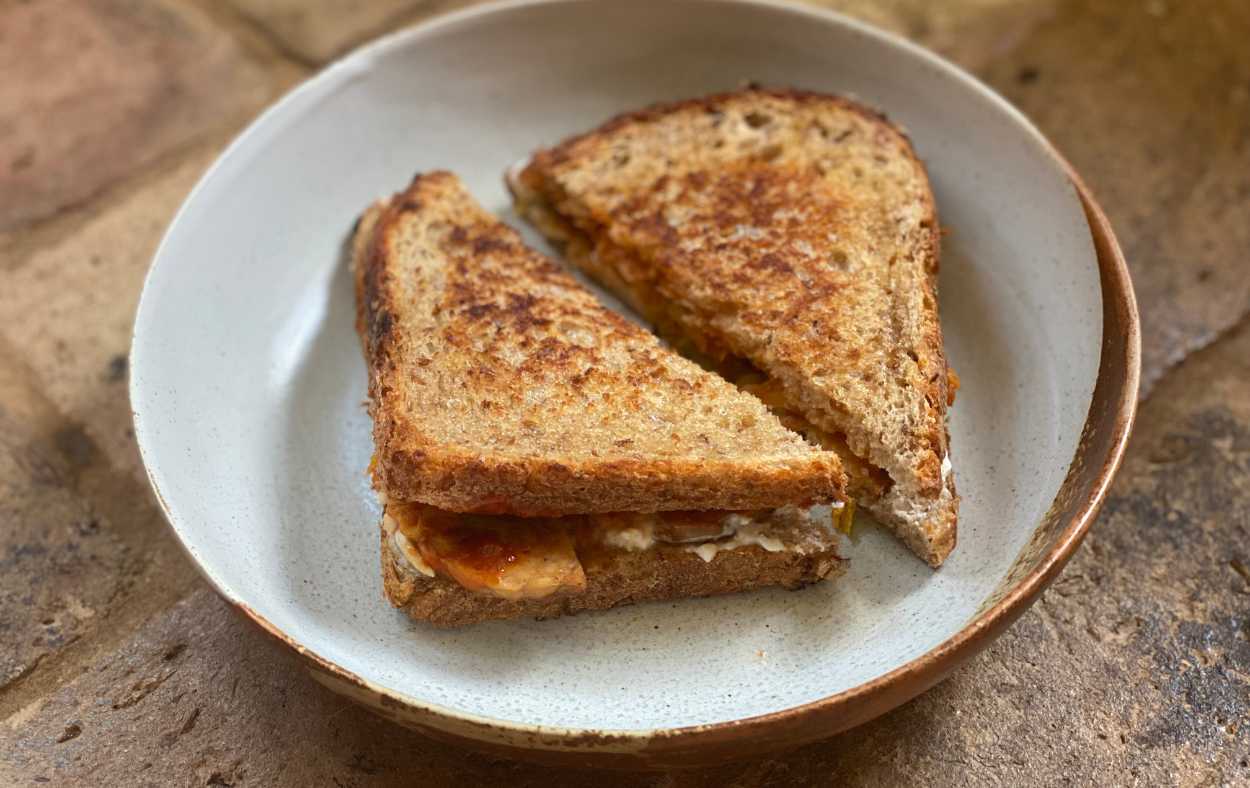
I think whoever first came up with the ingenious idea of putting kimchi inside a toastie deserves a medal. It is without a doubt one of the best comfort foods you’ll ever sink your teeth into.
I am a big toastie fan, having been a proud sandwich press owner throughout most of my life, and I am also equally a huge kimchi fan. There is something about fermented spicy food that just ticks all of the boxes for me. Plus it is a great probiotic-rich plant-based ingredient that your gut will love.
Sandwich that in between slices of sourdough bread and you’ve from true foodie heaven. Genius.
What is kimchi?
Kimchi is a type of fermented food which is most commonly made using a mix of cabbage, radish and gochujang chilli. It is a traditional Korean dish that is eaten on a daily basis either as a side dish or cooked into many popular Korean foods like stew (kimchi-jjigae) and kimchi pancakes (kimchijeon).
It tastes slightly spicy with a lovely deep fermented tang. I love eating it raw as well as cooking with it. Discover these delicious vegan kimchi recipe ideas as well as my very own vegan kimchi recipe.
Why put kimchi in a toastie?
Bread is a great vessel for pretty much any ingredient, especially when it is toasted with cheese. Or in our case, vegan cheese. It turns anything you want into delicious comfort food. Plus it is really easy to knock up for a nutritious and tasty lunch or midday snack.
Vegan kimchi toastie ingredients
- Bread: If you are after quite a substantial snack or lunchtime treat, then I recommend using a really good quality loaf of sourdough bread. It will be much more likely to fill you up.
- Vegan Kimchi: Kimchi isn’t traditionally vegan but most kimchi that you buy in UK supermarkets is accidentally vegan. Here is my favourite vegan kimchi you can buy.
- Vegan cheese: I really enjoy using a vegan cream cheese alternative which adds a lovely creaminess to this toastie recipe, but you could also use slices of vegan cheese which melt into the bread when you cook it.
- Vegan protein source: I am always trying to add protein to every dish I make, which is why you’ll see I’ve added tempeh slices into this recipe. You can do the same, or if you are less fussed about getting your protein in (maybe because you consume huge scoops of vegan protein powder) you can simply leave it out.
- Extras: I like my kimchi toasties to have a kick, so I add in a dollop of sriracha. You could also add slices of fresh chilli.
How do you make it?
It is really quick and simple to make a vegan kimchi toastie, especially if you already have some vegan kimchi in the fridge. If you don’t, then you are either going to need to start fermenting your own or buy some from the supermarket ready to eat.
1. Cook the tempeh
Tempeh is such a great protein source and it is really tasty when it is fried and then coated in a sauce. To complement this vegan toastie, I have coated it in a sticky soy maple sauce mix.
Simply fry it off in a frying pan (try out this eco frying pan) with a little splash of oil. Cook it on both sides for a few minutes each, until the tempeh is a lovely golden brown colour.
Dunk the fried tofu into the soy sauce mix on a plate or in a bowl and set aside until later.
2. Assemble the toasties
Place your bread slices on to a chopping board and assemble the ingredients on top.
I like to start with vegan cream cheese which is coated on one side of the toastie and the other I place the vegan kimchi. The tempeh can be rested on top of either side before joining the two halves together.
3. Add any extras
If you like it extra spicy, then you should try this vegan sriracha sauce by Dr. Will’s. It is much healthier than most sriracha products you’ll find in the supermarket.
Add this and any other extras that take your fancy (like vegan cheese slices) into the toastie before joining the two halves together.
4. Butter the outside
Once the toastie halves have been joined together you can use some vegan butter to coat the outsides of the bread to help create a lovely golden brown toasted outer.
5. Cook the toastie
There are multiple ways in which you can toast your toastie. If you have a sandwich press then you use this, as it’ll always produce the best toasties. But fear not, if you do not have a sandwich press then you can simply use a frying pan, or use these nifty toastie bags and pop it into your toaster.
Toast the bread until it turns into a lovely golden brown colour on the outside. This should take a few minutes on each side.
6. Slice and devour your vegan kimchi toastie
Remove your toastie from your toastie-making device and slice it into triangles (or rectangles if you are one of those strange people). Serve it up and devour it straight away!
Vegan kimchi toastie recipe
Equipment
Ingredients
- 100 g tempeh
- 1/2 tbsp soya sauce
- 1/2 tbsp maple syrup
- 4 slices sourdough bread
- 2 tbsp vegan cream cheese
- 2 tbsp vegan kimchi
- Sriracha
- Vegan butter - for outside of the bread
Instructions
- Mix together the soya sauce and maple syrup and place into the bottom of a plate or shallow bowl
- Cut your tempeh into thin slices
- Put a splash of oil into a frying pan and place it on a medium-high heat
- Once the pan is hot, add your tempeh slices and fry for a few minutes before flipping and cooking for the same time on the other side. The outside of the tempeh should be a lovely golden brown colour
- Move the cooked tempeh slices from the pan to the bowl with the sweet soya sauce mix. Mix the tempeh into the sauce until they are well coated and set aside for later
- Place your sourdough bread slices onto a chopping board and spread vegan cream cheese on one half and vegan kimchi on the other
- If you are using, add the sriracha sauce on top of the kimchi and spread it about
- Place the cooked tempeh slices on top of the vegan cream cheese and then fold the two halves of bread together to form a whole toastie
- Heat up your sandwich press or frying pan whilst you butter the outside of the toasties
- Place the toastie inside your cooking device and cook for a few minutes on each side, until the bread goes golden brown
- Slice it and serve!
Leave a Reply